Hi guys,
Today in this blog post where I’m going to show you how to configure Sarg service to use with E2guardian to get reports from E2guardian. Sarg package creates graphical access report from proxy log files. If you use E2guardian, I would strongly recommend you to use Sarg to get graphical access report from E2guardian instead of use Lightsquid. For me, the Sarg is greater than Lightsquid. Sarg has so much potential and features than Lightsquid.
You should know that you have had set up the E2guardian already for follow the blog post.
https://lifeoverlinux.com/how-to-block-http-and-https-websites-with-e2guardian/
pfSense 2.4.4 was used during this process.
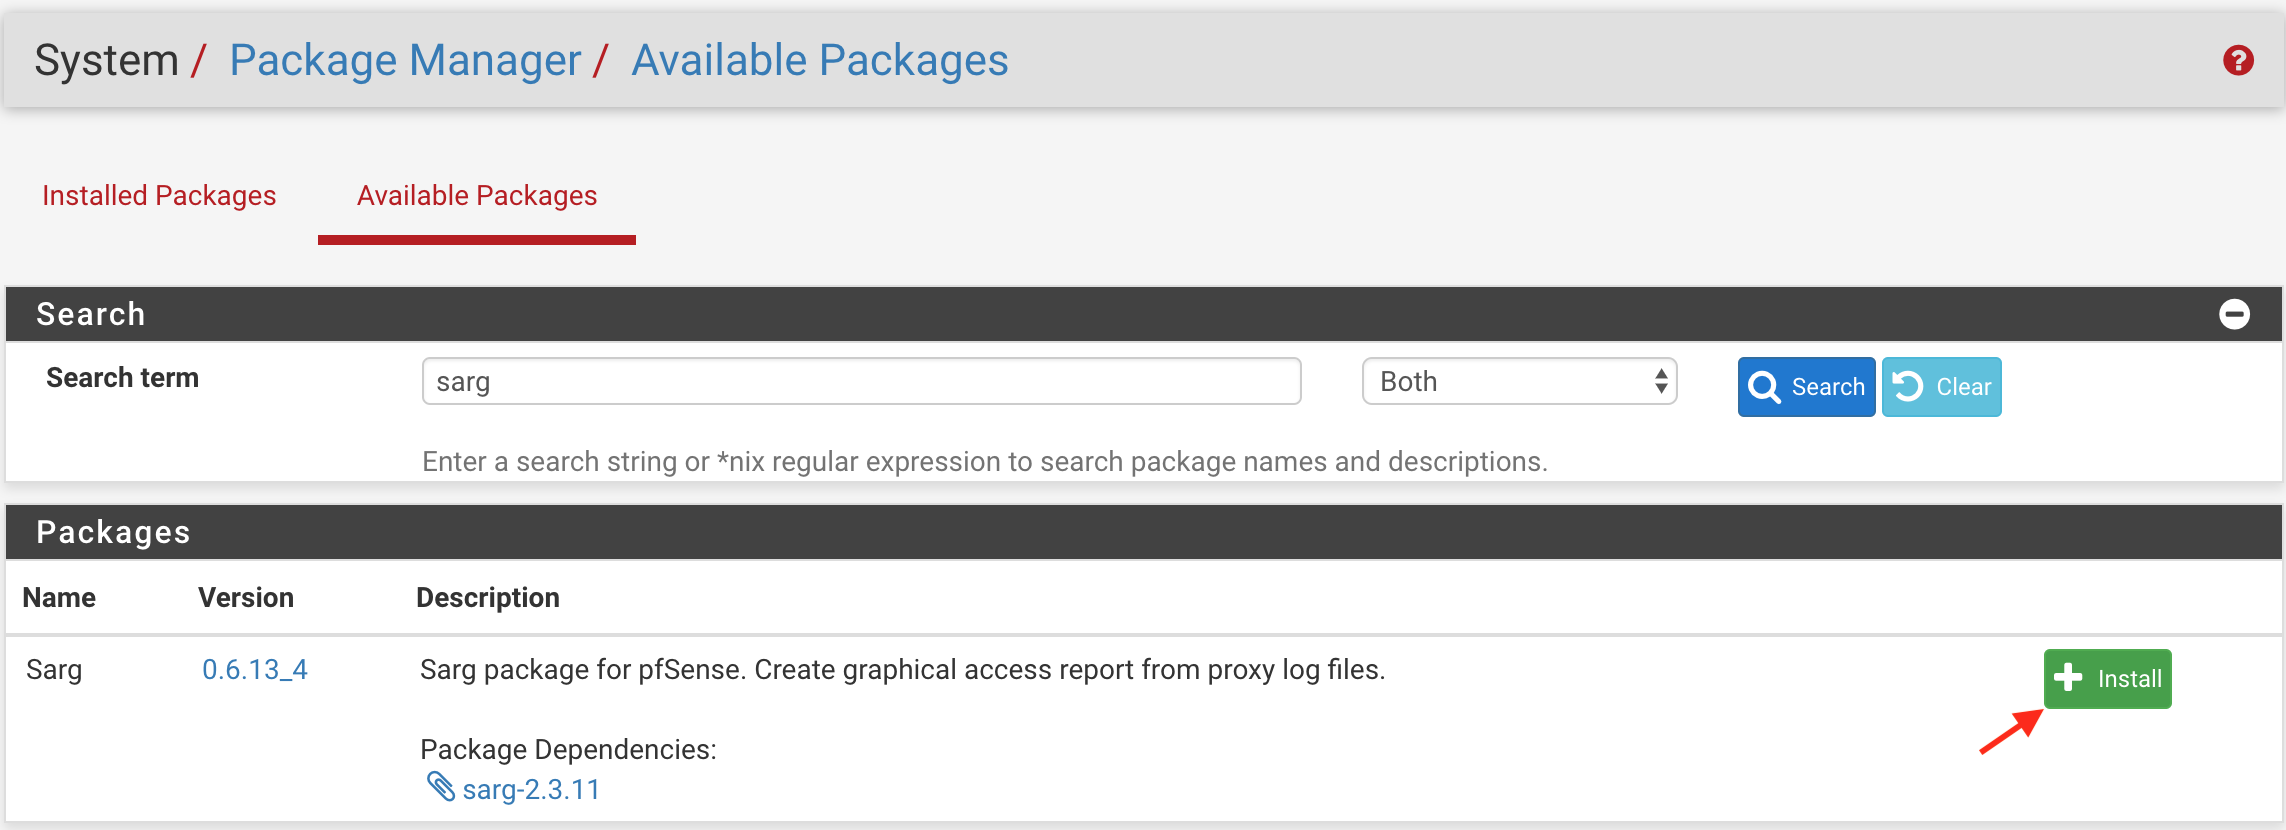
Install Sarg Package
Go to System > Package Manager and search for Sarg package then install it.
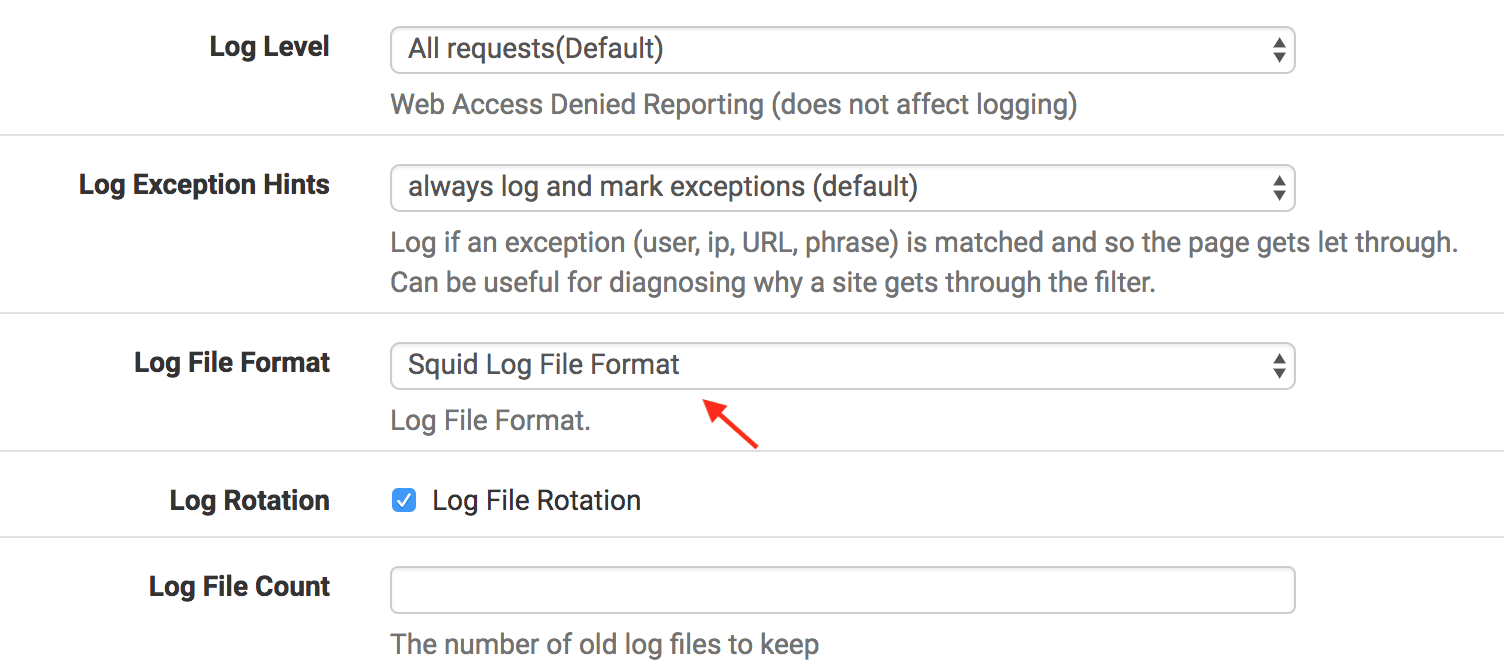
Configure E2guardian Service
Go to Services > E2guardian menu and under the Log Settings please find Log Format and change it to Squid Log Format then do not forget to Save settings.
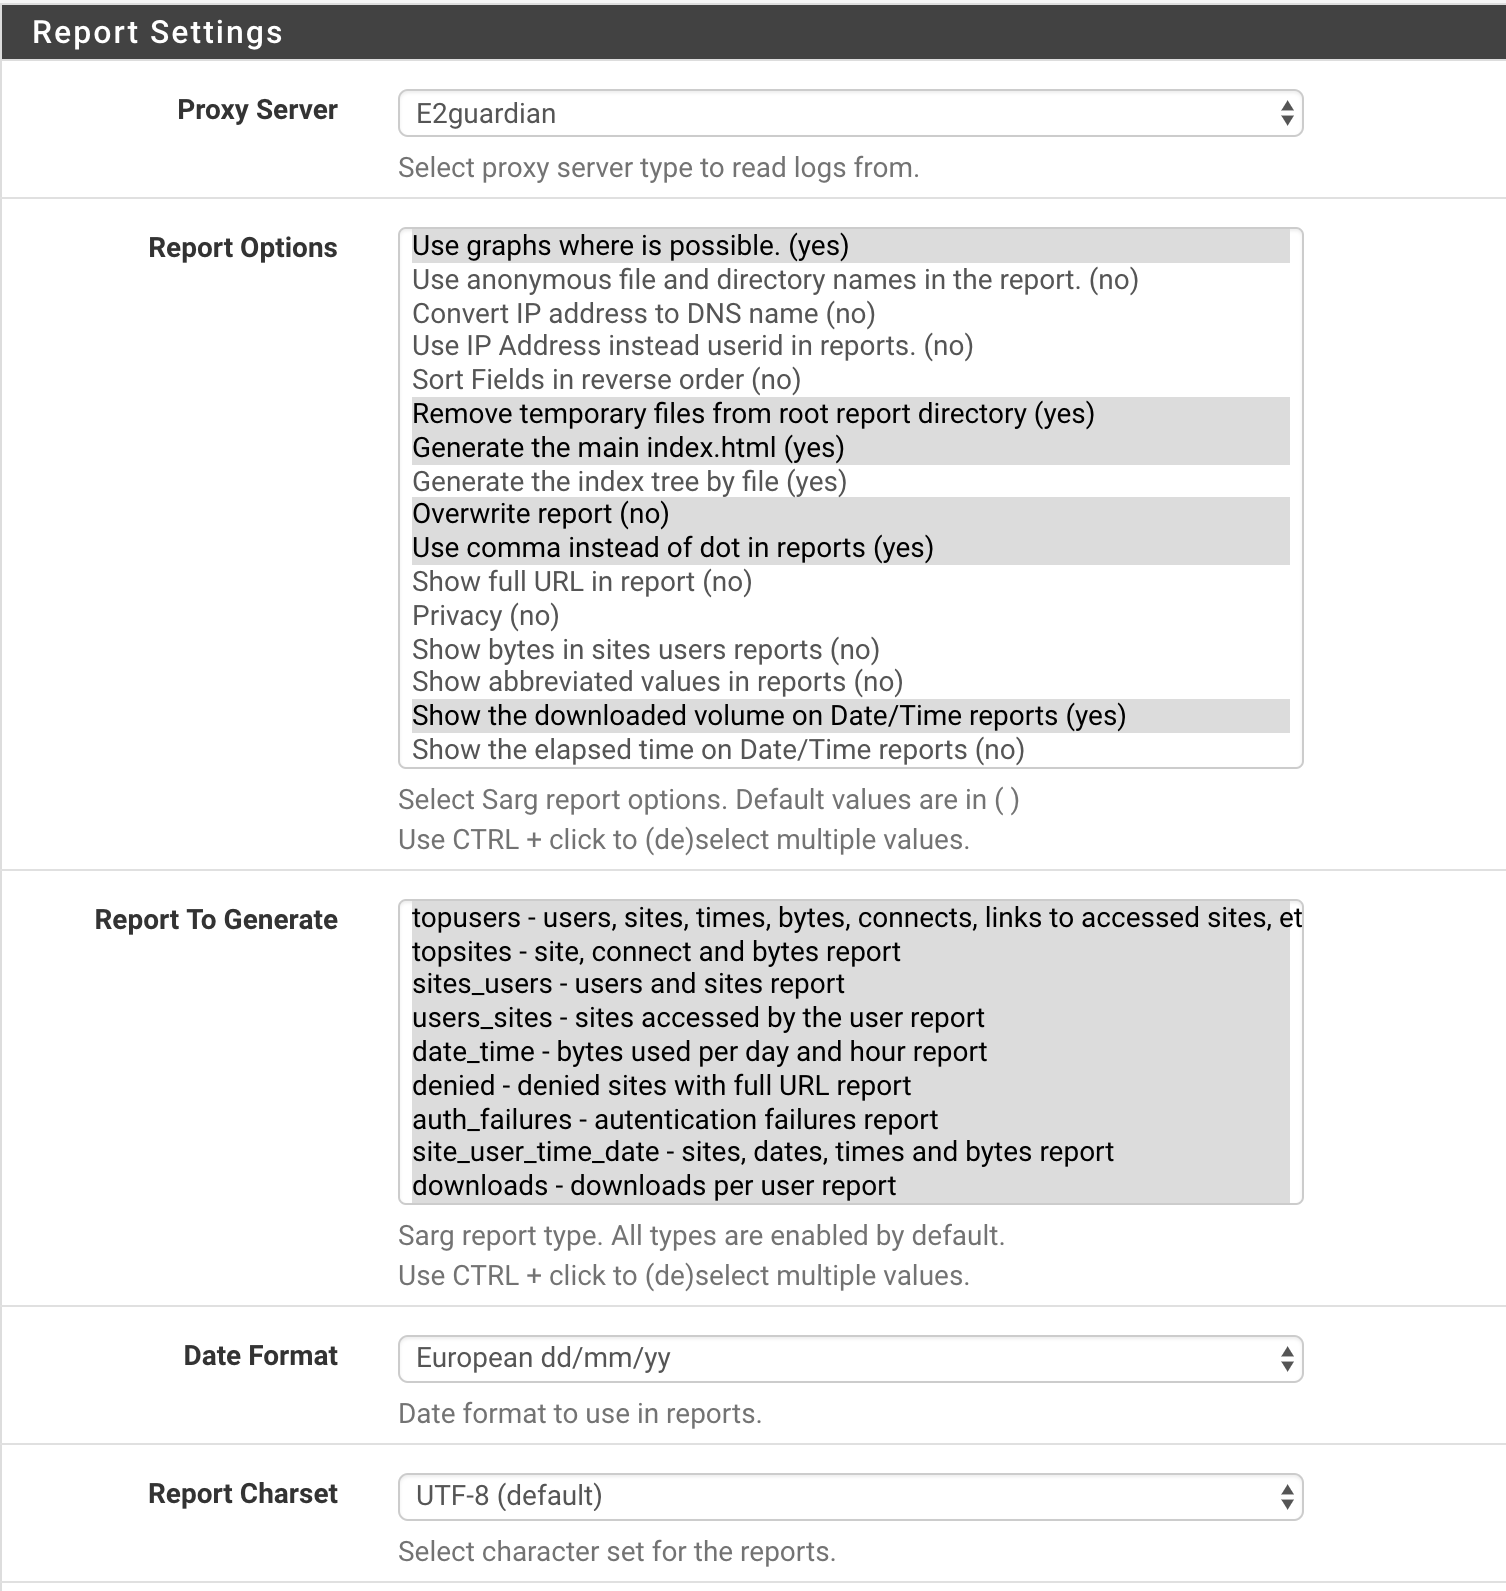
Configure Sarg Service
Go to Status > Sarg Reports menu. In the following picture, you can see what you need to do. Do not forget to Save settings!
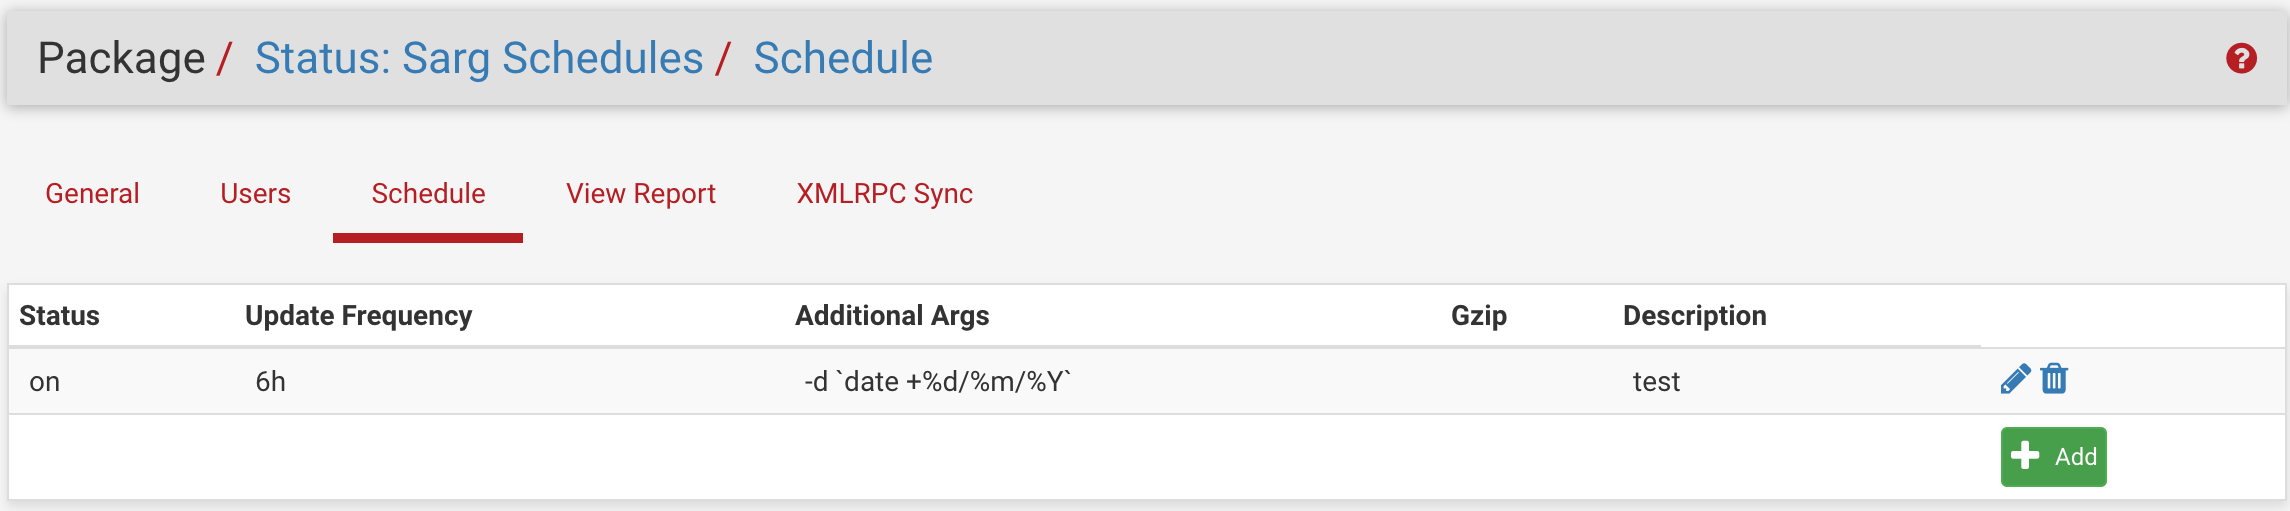
Now go to the Schedule tab and create a schedule. I shared an example schedule rule, so you can make the same rule like me or configure as you wish. For now, create like me and then if everything works, you can customize the schedule later.

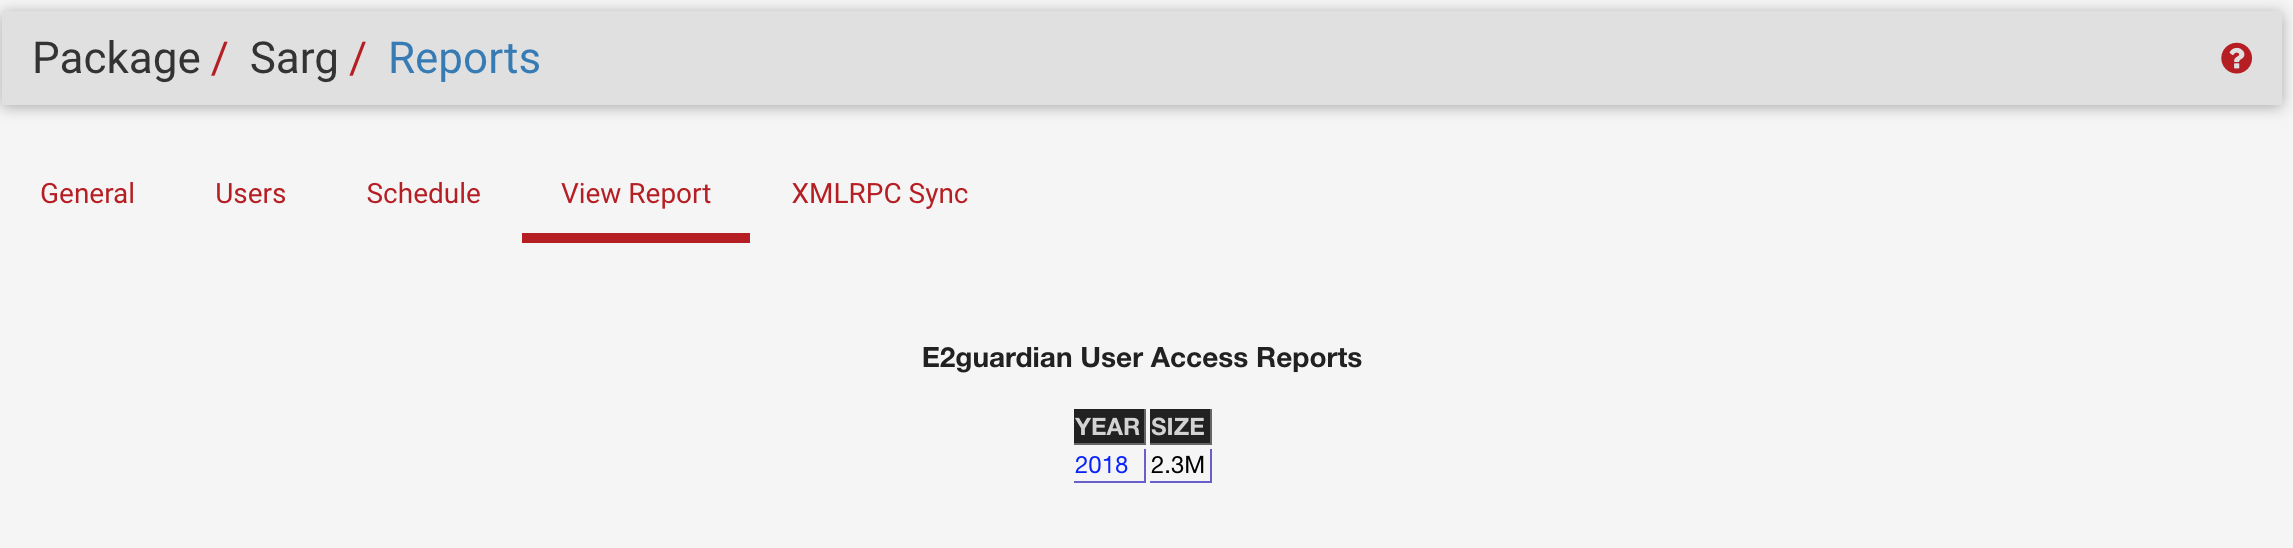
After you created a schedule, edit the schedule and click “Force update now” button. And then go to “View Report” tab. You will see today’s logs like the following picture.

Troubleshooting
If you don’t see the report on “View Report” menu, try to debug the service by using the following command.
pfsense# sarg -x
If you still see “no index file” error message, make sure traffic goes through from the following file.
pfsense# tail -f /var/log/e2guardian/access.log
If the problem still exists, try to reboot your pfsense. After that check again “View Report” menu.
pfsense# reboot
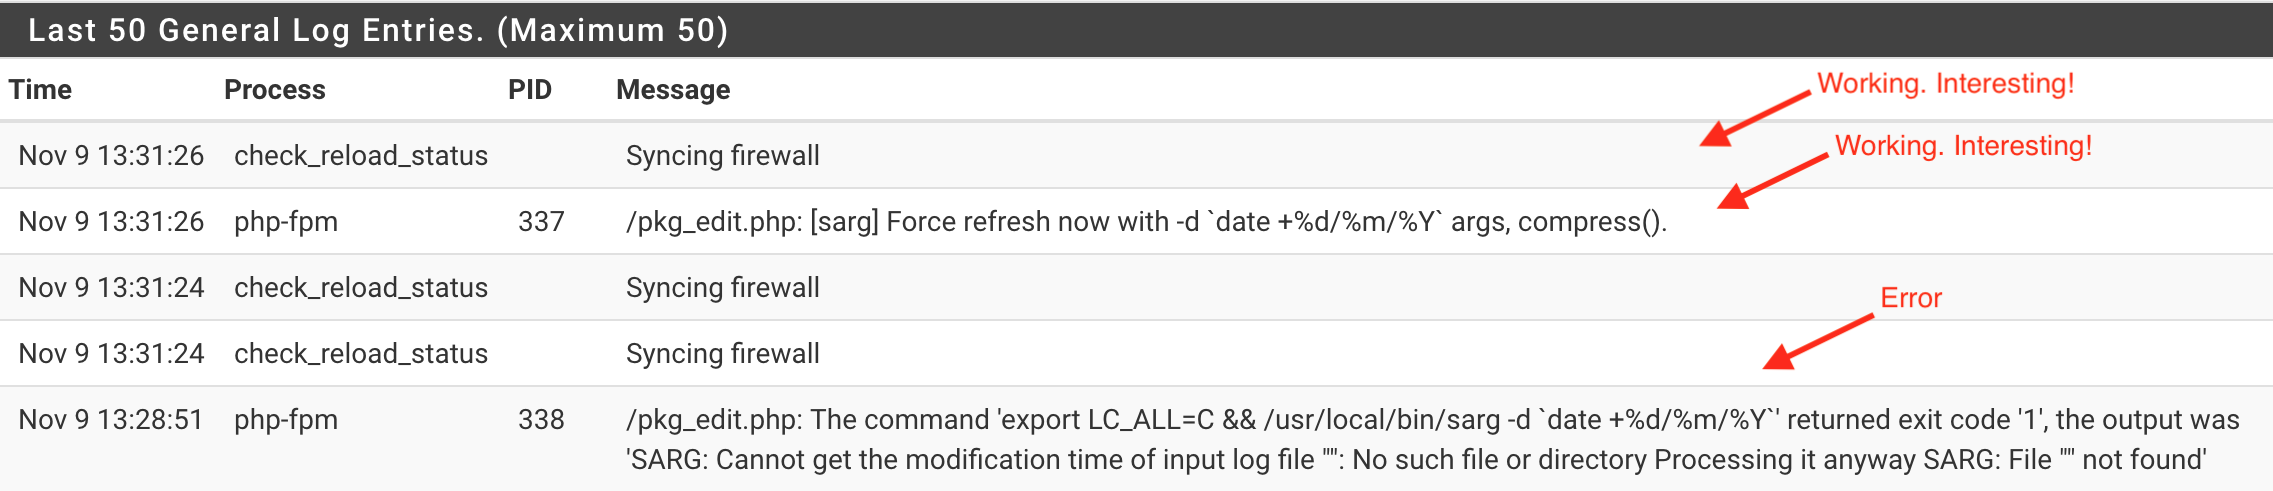
It is so strange that if you go to Status > System Logs. You might see the following error after you clicked “Force update now” button. Well, go to click “Force update now” button again, and you might not see the following error. :/
If someone understand the problem, please let me know.
That’s all for now.
Eline sağlık fakat benzer makaleler İngilizce olarak ziyadesiyle var. Türkçe kaynak çok yeterli değil, Türkçe olmasını dilerdim. Bence daha faydalı olurdu.
Türkçe yazdığım zaman kimse okumuyor emin olabilirsiniz. İstatistikler bunu gösteriyor ve bende artık İngilizce yazmaya karar verdim ve baktımki çok fazla okunuyor ve böyle devam ediyorum. İngilizce dilinde kendimi daha rahat hissediyorum ve daha iyi yazılar yazabiliyorum. Teşekkürler yorum için.
İbrahim Bey selamlar,
Tüm işlemleri yapmama rağmen bir türlü raporlama işlemini yaptıramadım.
Şöyle bir hata verdiğini fark ettim.
Cannot create directory “/usr/local/sarg-reports”: File exists
Ve bu dosyayı silerek tekrardan yukarıda verdiğiniz sarg -x komutu ile hata vermediğini gördüm. tekrardan rapor sayfasına geçinde rapor ekranının geldiğini gördüm. Yeni Pfsense kullanmaya başlamama rağmen uğraşarak sorunu çözdüm. Aynı zamanda 5651 Loglama işlemini de Sizin verdiğiniz bilgiler ile ayarlamıştım. Fakat E2guardian ile kullanmamıştım. dosya içerisindeki ufak bir değişiklik ile imzalama işlemini de yaptım. Gerçekten bilgiler için çok teşekkür ederim.
İyi çalışmalar.
Sorunları çözmeniz çok hoşuma gitti açıkcası. E2guardian ile 5651 yapmanızda çok hoş, sadece squid adlı bir imzalama scriptini editleyip içeriğindeki dosya yolunu E2guardian dosyasının yolunu verirmişseniz sıkıntı yok çalışır. Diğer script dosyalarını silebilirsiniz(https*.sh).
Kolay gelsin.