About Author
This article is written by İbrahim UÇAR and it could shared without permission of owner’s while reference his name.
If you wish to contact with me, please follow below links.
- twitter.com/ucribrahim
- lifeoverlinux.com
- [email protected]
Introduction
Usually malicious domains are targeting end-users. In this article we will look at the pfBlockerNG application for block malicious domains. Well, as you can use this application also there are many program/ways on the internet for block malicious domains. The pfBlockerNG package is created in 2015 by BBcan177. In this article I will show you how to block malicious address in pfsense with pfblockerNG.
pfBlockerNG is a package for pfSense version 2.x (including latest versions) that allows the use of custom block list, IP filtering and country-based ban functions. The pfBlockerNG package can be used for filter out malicious domain names and to ensure that the internal network, computers, and user are not exposed to these malicious domain addresses or ransom events.
pfBlockerNG Features
pfBlockerNG package features are listed below. There are no all features; just important features are shown up below.
- Can ban the malicious/fake websites as a list.
- Can ban the malicious/bad ip address as a list. IPv4/IPv6
- Can ban the country based.
- Can synchronize with another pfsense which is using pfblockerng.
- And other small but useful features.
Installation pfBlockerNG
In the main menu, follow the System > Package Manager > Available Packages and after that find the pfBlockerNG package and click the + button to install the package.

Configuration pfBlockerNG
After the package is installed, enter the Firewall > pfBlockerNG menu. In the “General” tab, you can manage the pfblockerng features. We enable the features in the picture below.
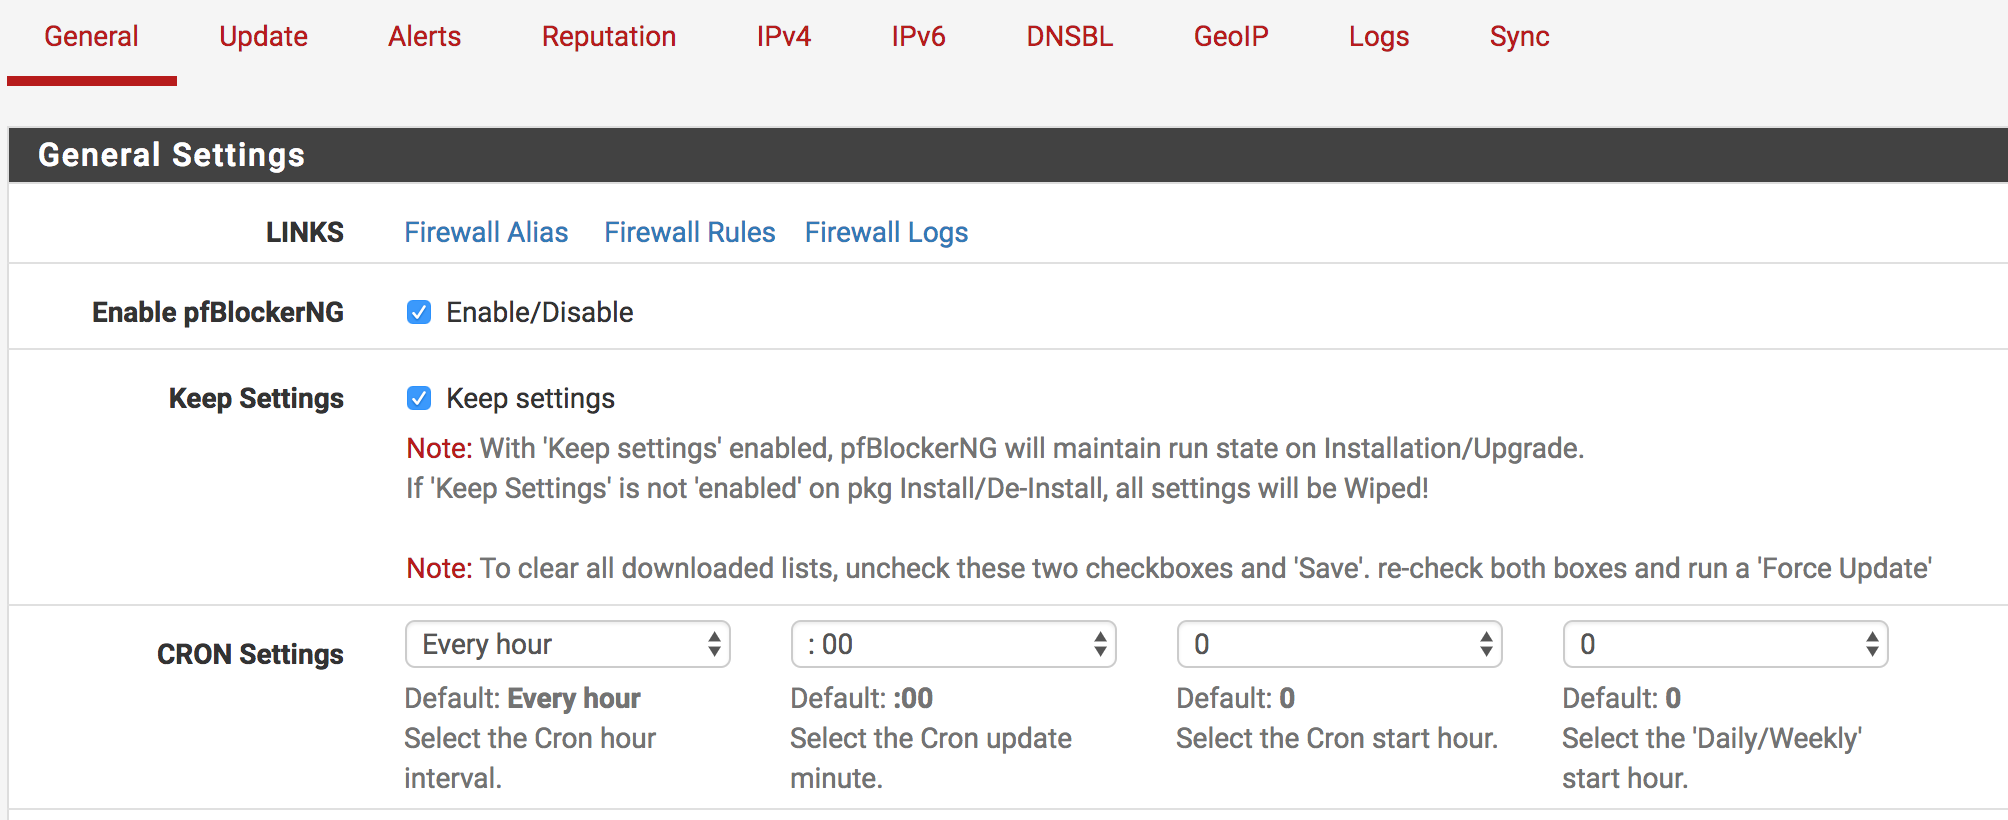
| Settings Name | Description |
| LINK | Shortcuts has been added to access (firewall alias, rules, logs) easily and save time. |
| Enable pfBlockerNG | Enable the pfBlockerNG feature. |
| CRON Settings | Here you can specify the work range of the Cron tool. |
| Global Logging | Firewall Rule logging – Enable Global logging to [ Status: System Logs: FIREWALL Log ]. This overrides any log settings in the Continent/IPv4/6 Alias tabs. (DNSBL not included) |
| Logfile Size | Select number of Lines to keep in the pfblockerng.log, geoip.log, extras.log and dnsbl.log files. Default: 20000 |
Interface/Rules Configuration
Before you leave from the “General” tab that we need to look at the under this tab. Under this tab, the type of network interfaces detection and blocking is should be set. If you many interfaces you have, you may can select the other interfaces.
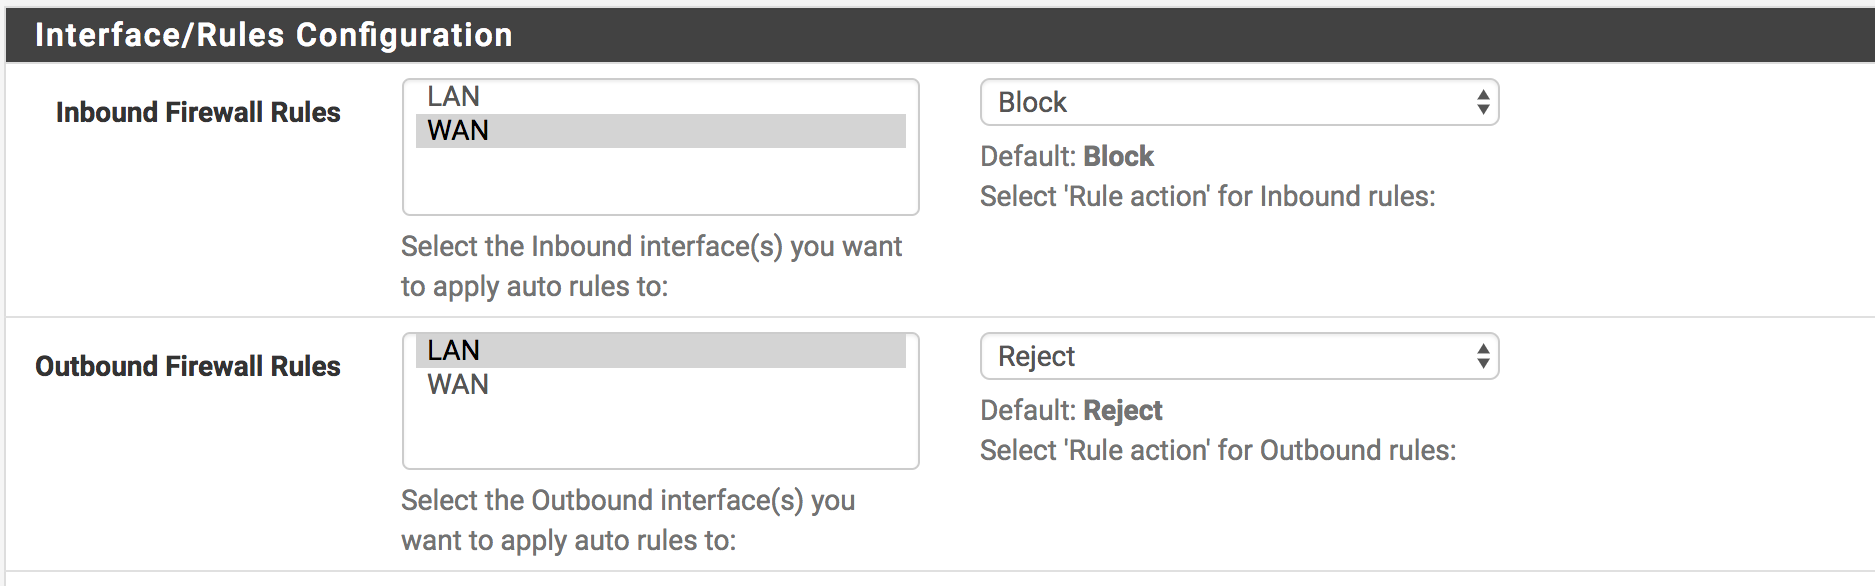
Inbound Firewall Rules : Select the Inbound interface(s) you want to apply auto rules to. From internet traffic to local network.
Outbound Firewall Rules : Select the Outbound interface(s) you want to apply auto rules to. From local clients to internet.
- Block : It will block the package and will not send any error message to user.
- Reject : It will block the package and returning ICMP error message to user.
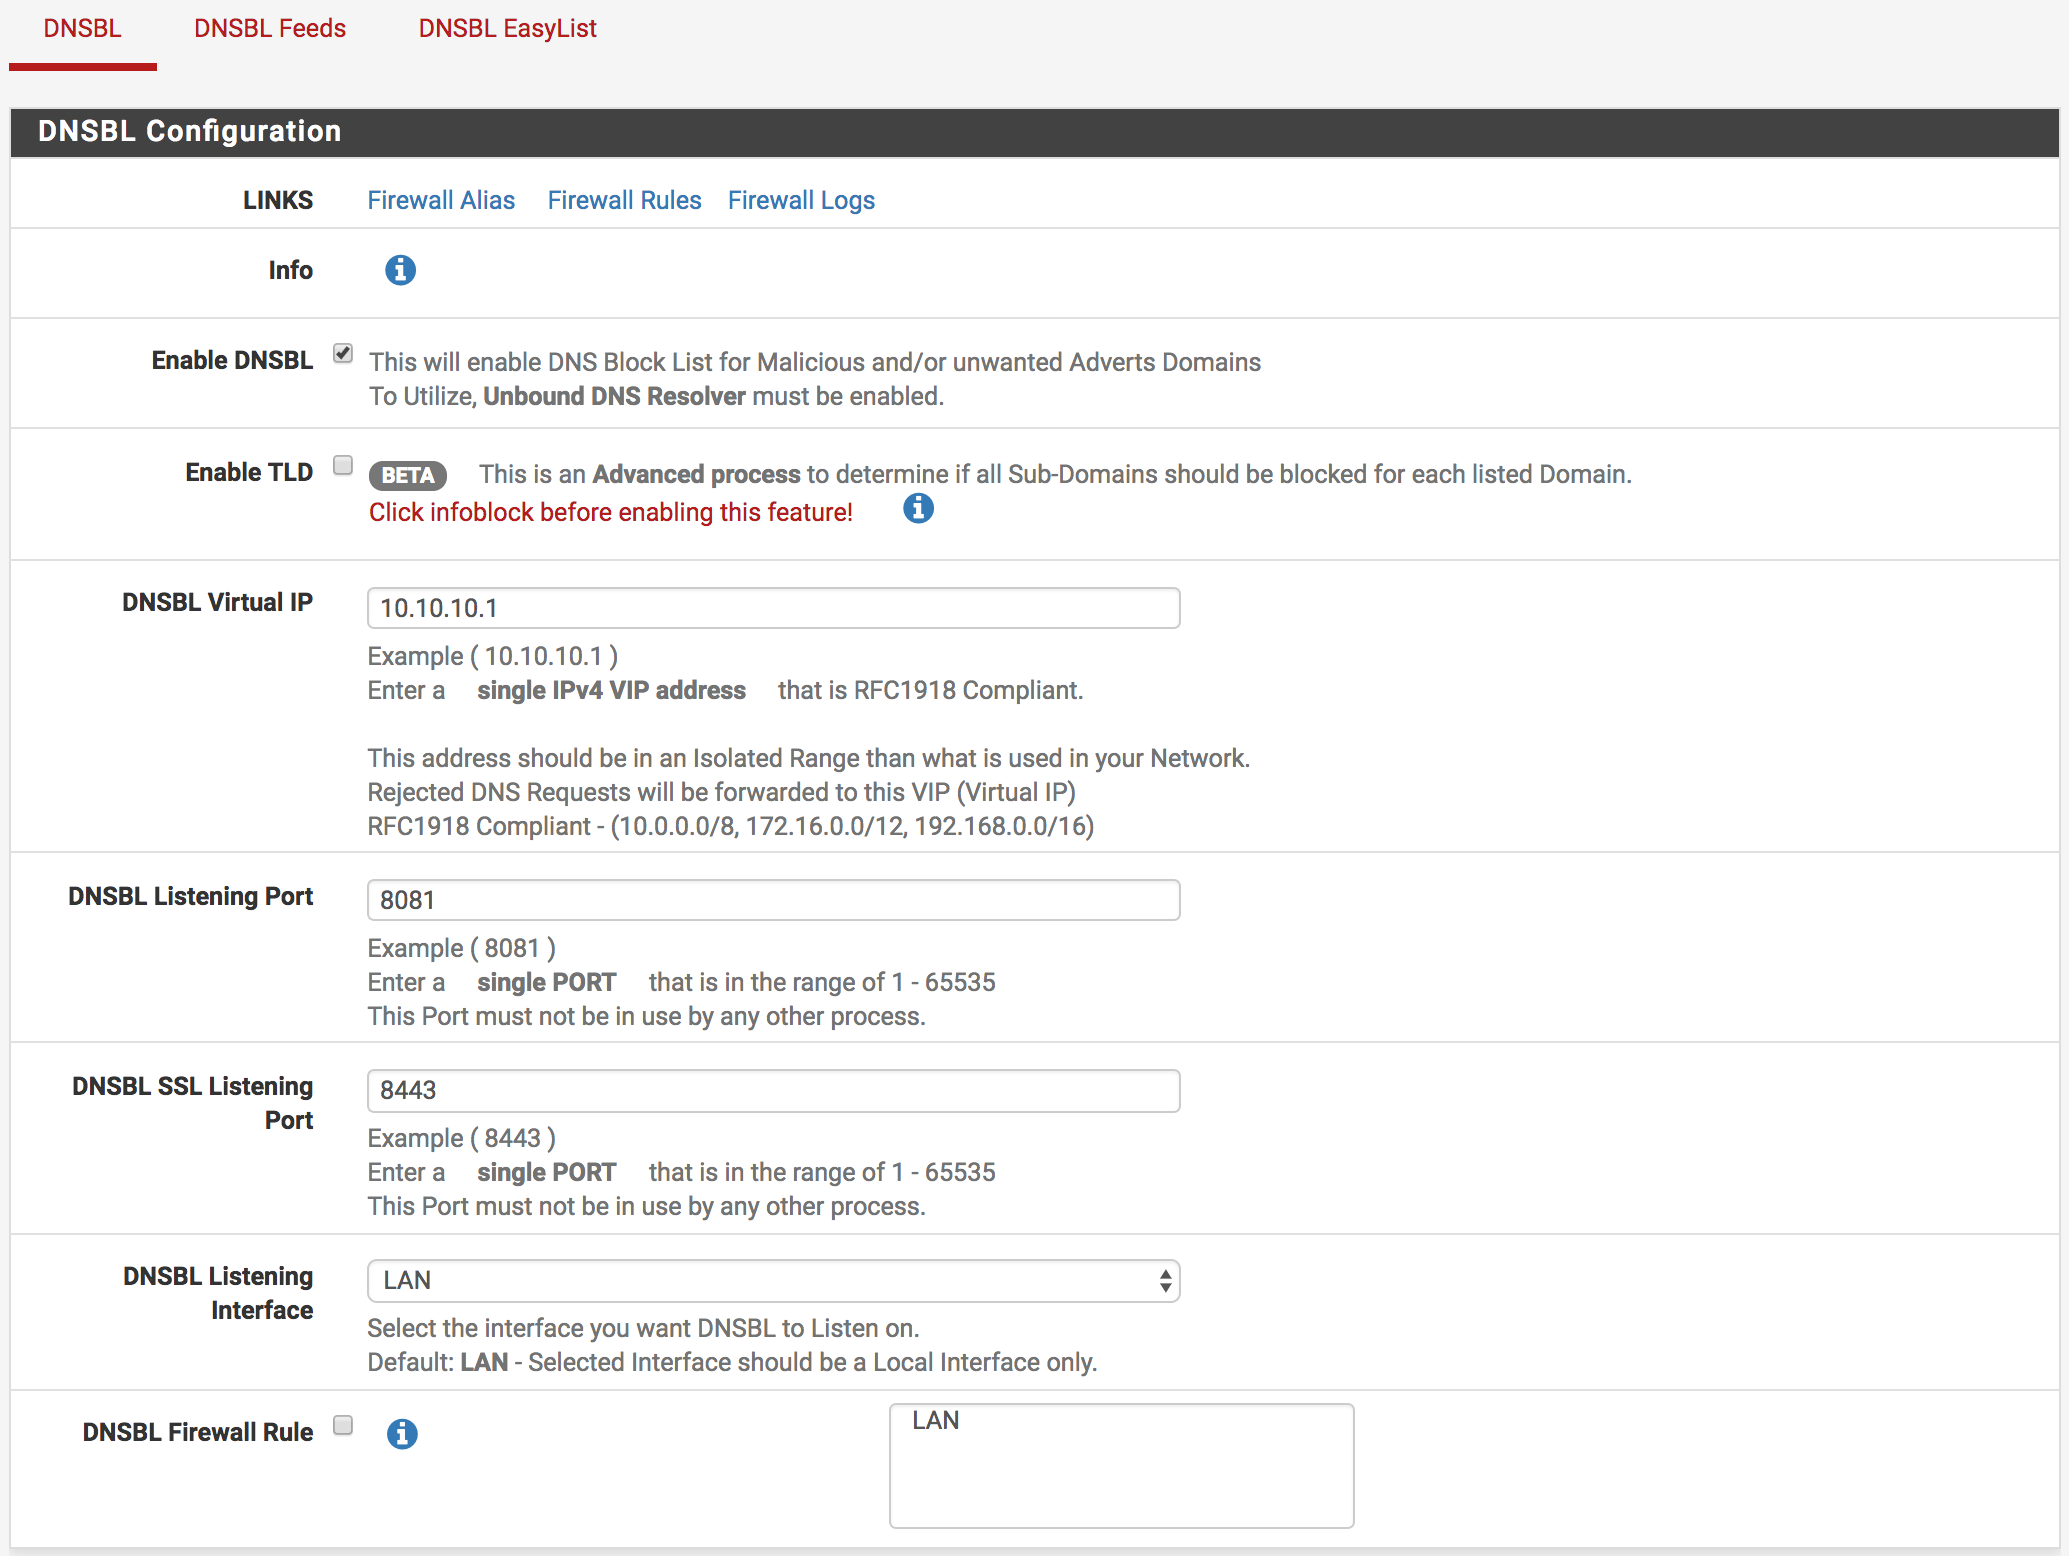
DNSBL Configuration
The DNSBL resolver is used as the DNS service. When a DNS request is made for a domain listed in DNSBL, the request is forwarded to the virtual ip address which is on the DNSBL.
Please enter the DNSBL tab from the pfBlockerNG menu. In this tab, The settings are saved by clicking the “Save” button after making the settings as below.
Info : This button gives information the features which are on the tab.
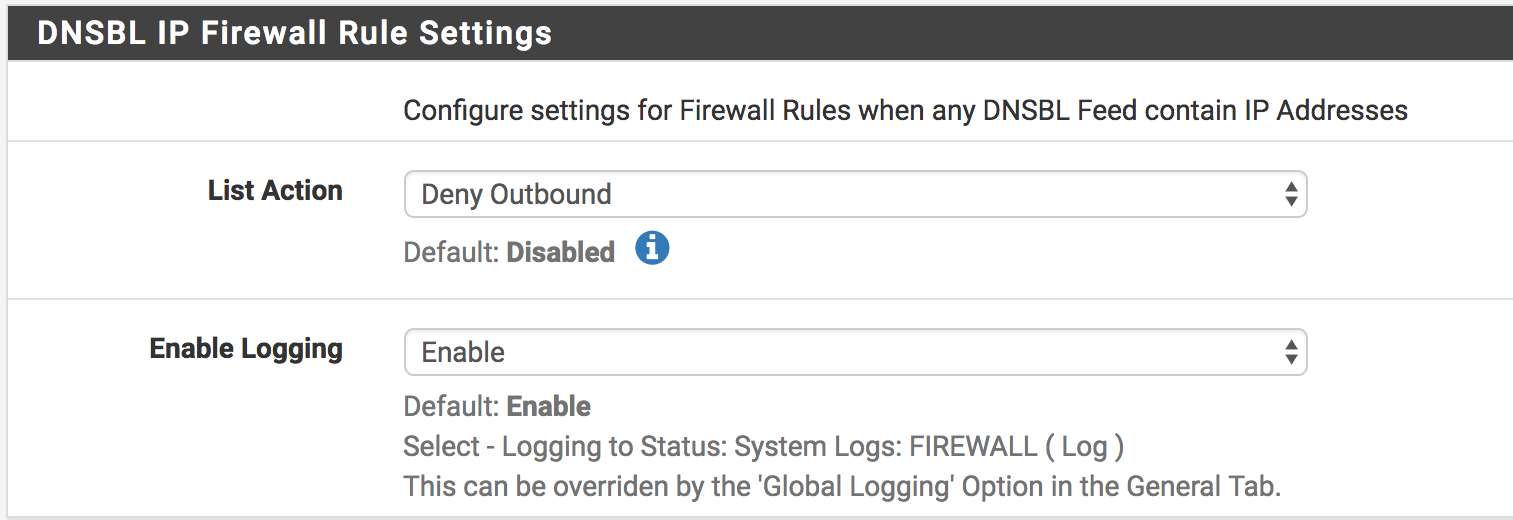
DNSBL IP Firewall Rule Settings
In here we need to select action for list. The action to be performed will indicate the lists to be entered are blocked or not. Do not forget to apply settings.
DNSBL Feeds
This feature allows you to deny malicious domains. But at this point, you can’t use a single domain like ( http://www.example.com ). This feature gets the domains from the link where you put all domains inside to .txt file like this ( http://www.example.com/domains.txt ).
I will show you how to ban malicious domains using the URL address where malicious/fake domains are provided by Normshield. Also you can find the other malicious/fake URL address from the other websites. But I strongly recommend to use url address is provided by NormShield because it always up to date!
NormShield has a free service which gives you a URL address include malicious/fake domains. You just need to register as a company from here, that’s all.
Let’s get it start.
Click the + button for new rule in DNSBL tab. Do not forget the rules!
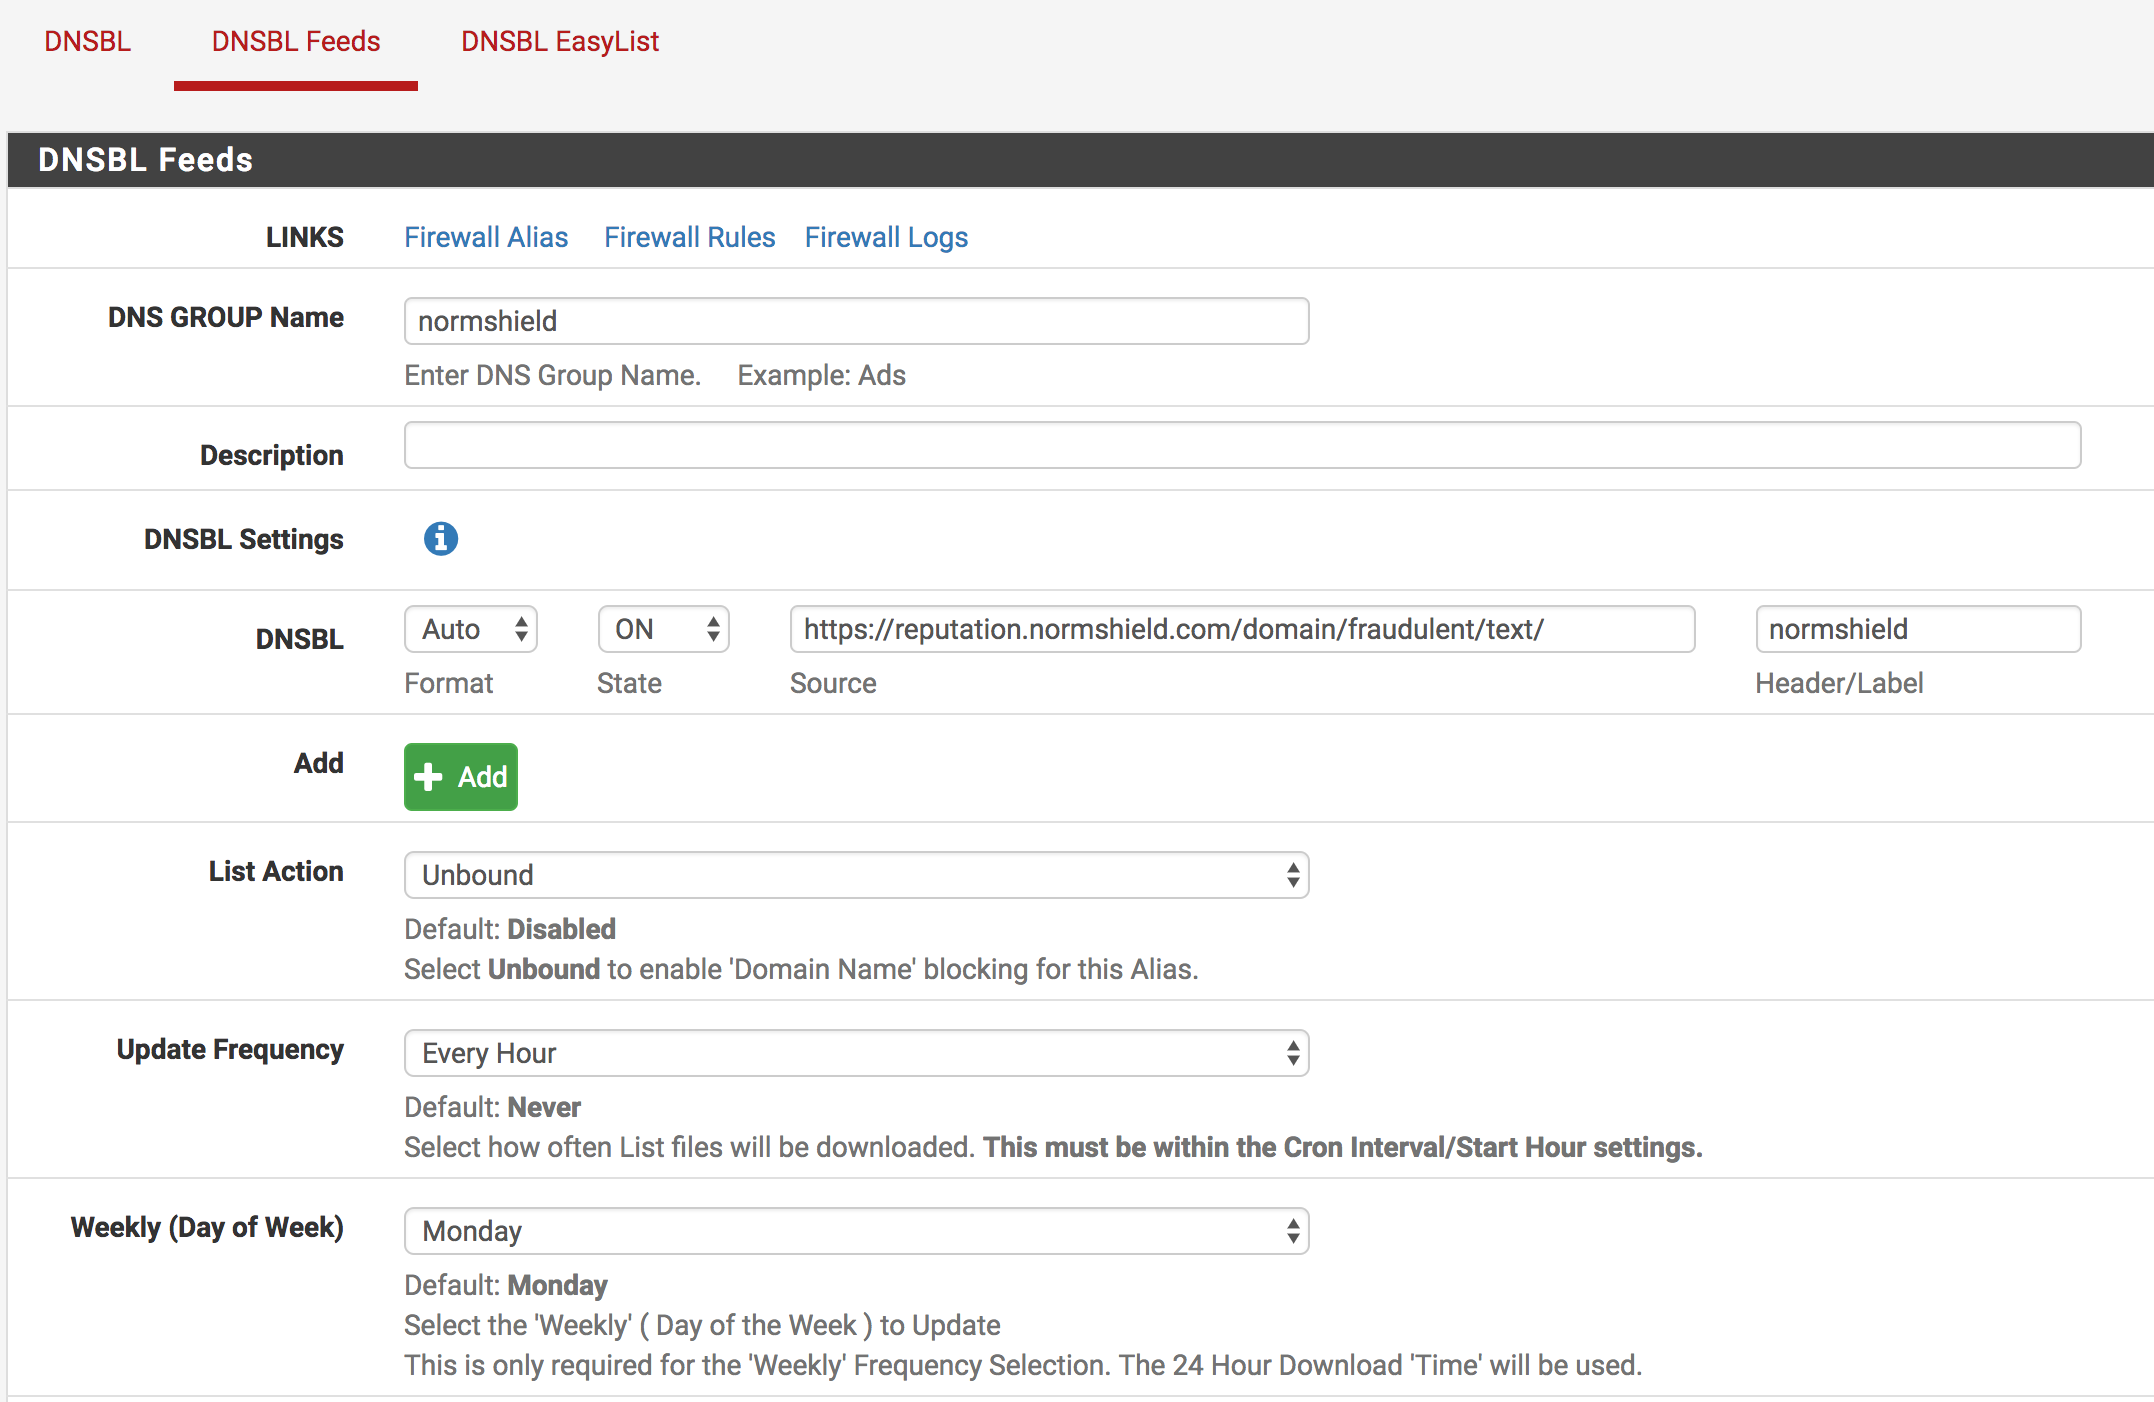
| Settings Name | Description |
| DNS Group Name | Enter DNS group name. ( example: normshield ) |
| DNSBL | It is recommended to make settings as shown below. You can change some areas to suit you. |
| Add | By clicking on this button you can create more than one link in a group. |
| List Action | Select Unbound to enable ‘Domain Name’ blocking for this Alias. |
| Update Frequency | Select how often List files will be downloaded from the URL. |
Update
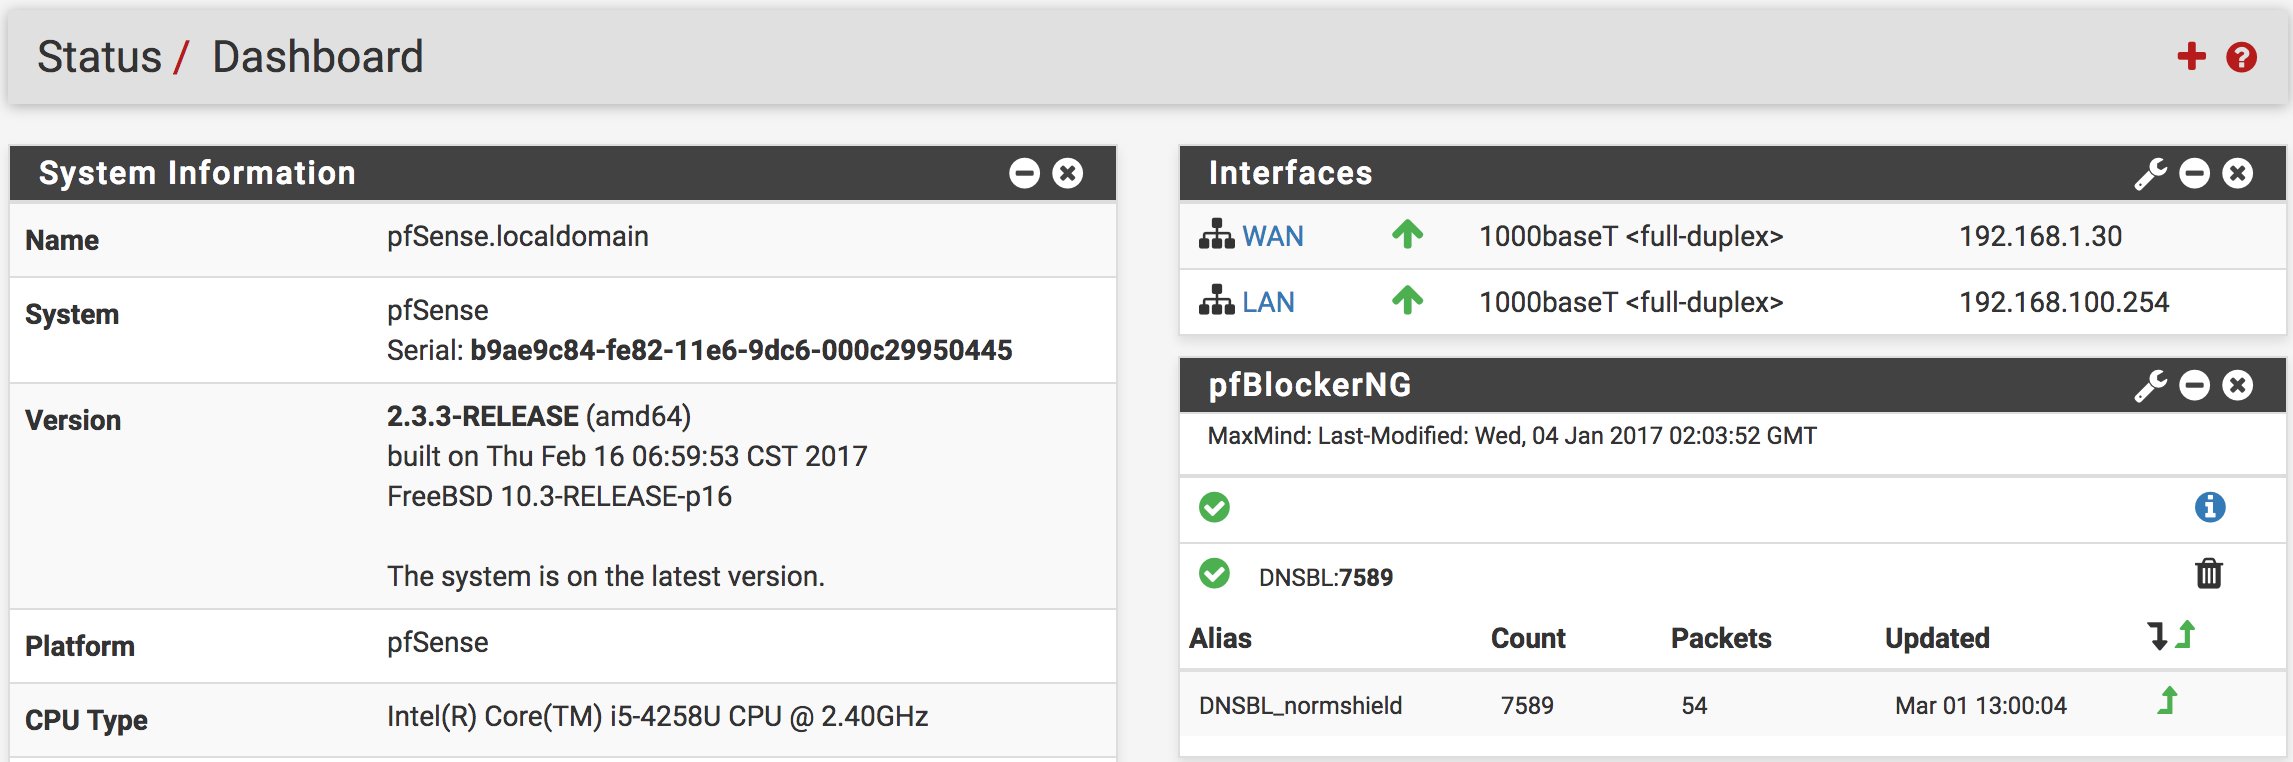
Finally, you can update the “Update” tab to download the malicious/fake domain names provided by NormShield as a group. The output after the update will be similar to the following output. You can also see the how many url downloaded at the output.

You can also see the activity of the DNSBL groups at the pfSense dashboard.
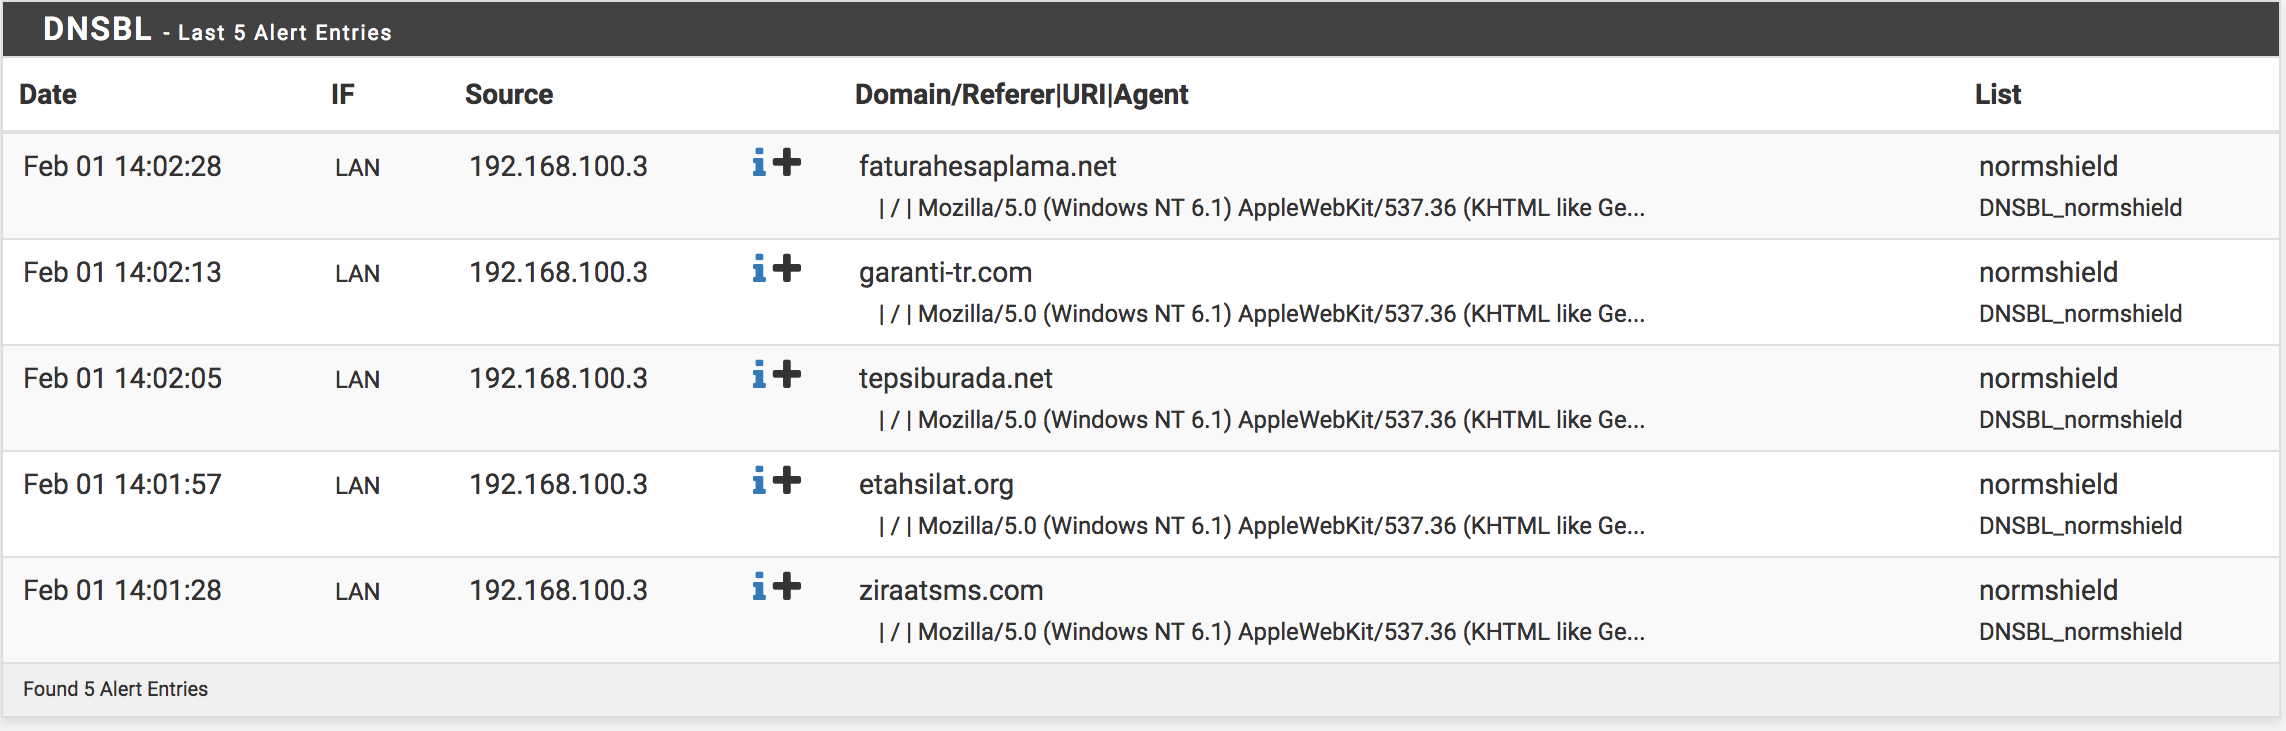
Alerts
You can see the clients which is trying to access denied domains from this section. This tab also allows you to apply rules for users on the same time.
Icons that can be used and what they doing;
![]() Look up the link address in “Threat Source”
Look up the link address in “Threat Source”
![]() Add to the IP / Domain whitelist list. (DNSBL)
Add to the IP / Domain whitelist list. (DNSBL)
![]() Add to the TLD domain whitelist list. (TLD)
Add to the TLD domain whitelist list. (TLD)
![]() The domain is already in the whitelist list.
The domain is already in the whitelist list.
![]() The domain is already in the whitelist list. (Custom Whitelist entry prefixed by a “dot”)
The domain is already in the whitelist list. (Custom Whitelist entry prefixed by a “dot”)
![]() Domain is blocked by a whole TLD.
Domain is blocked by a whole TLD.
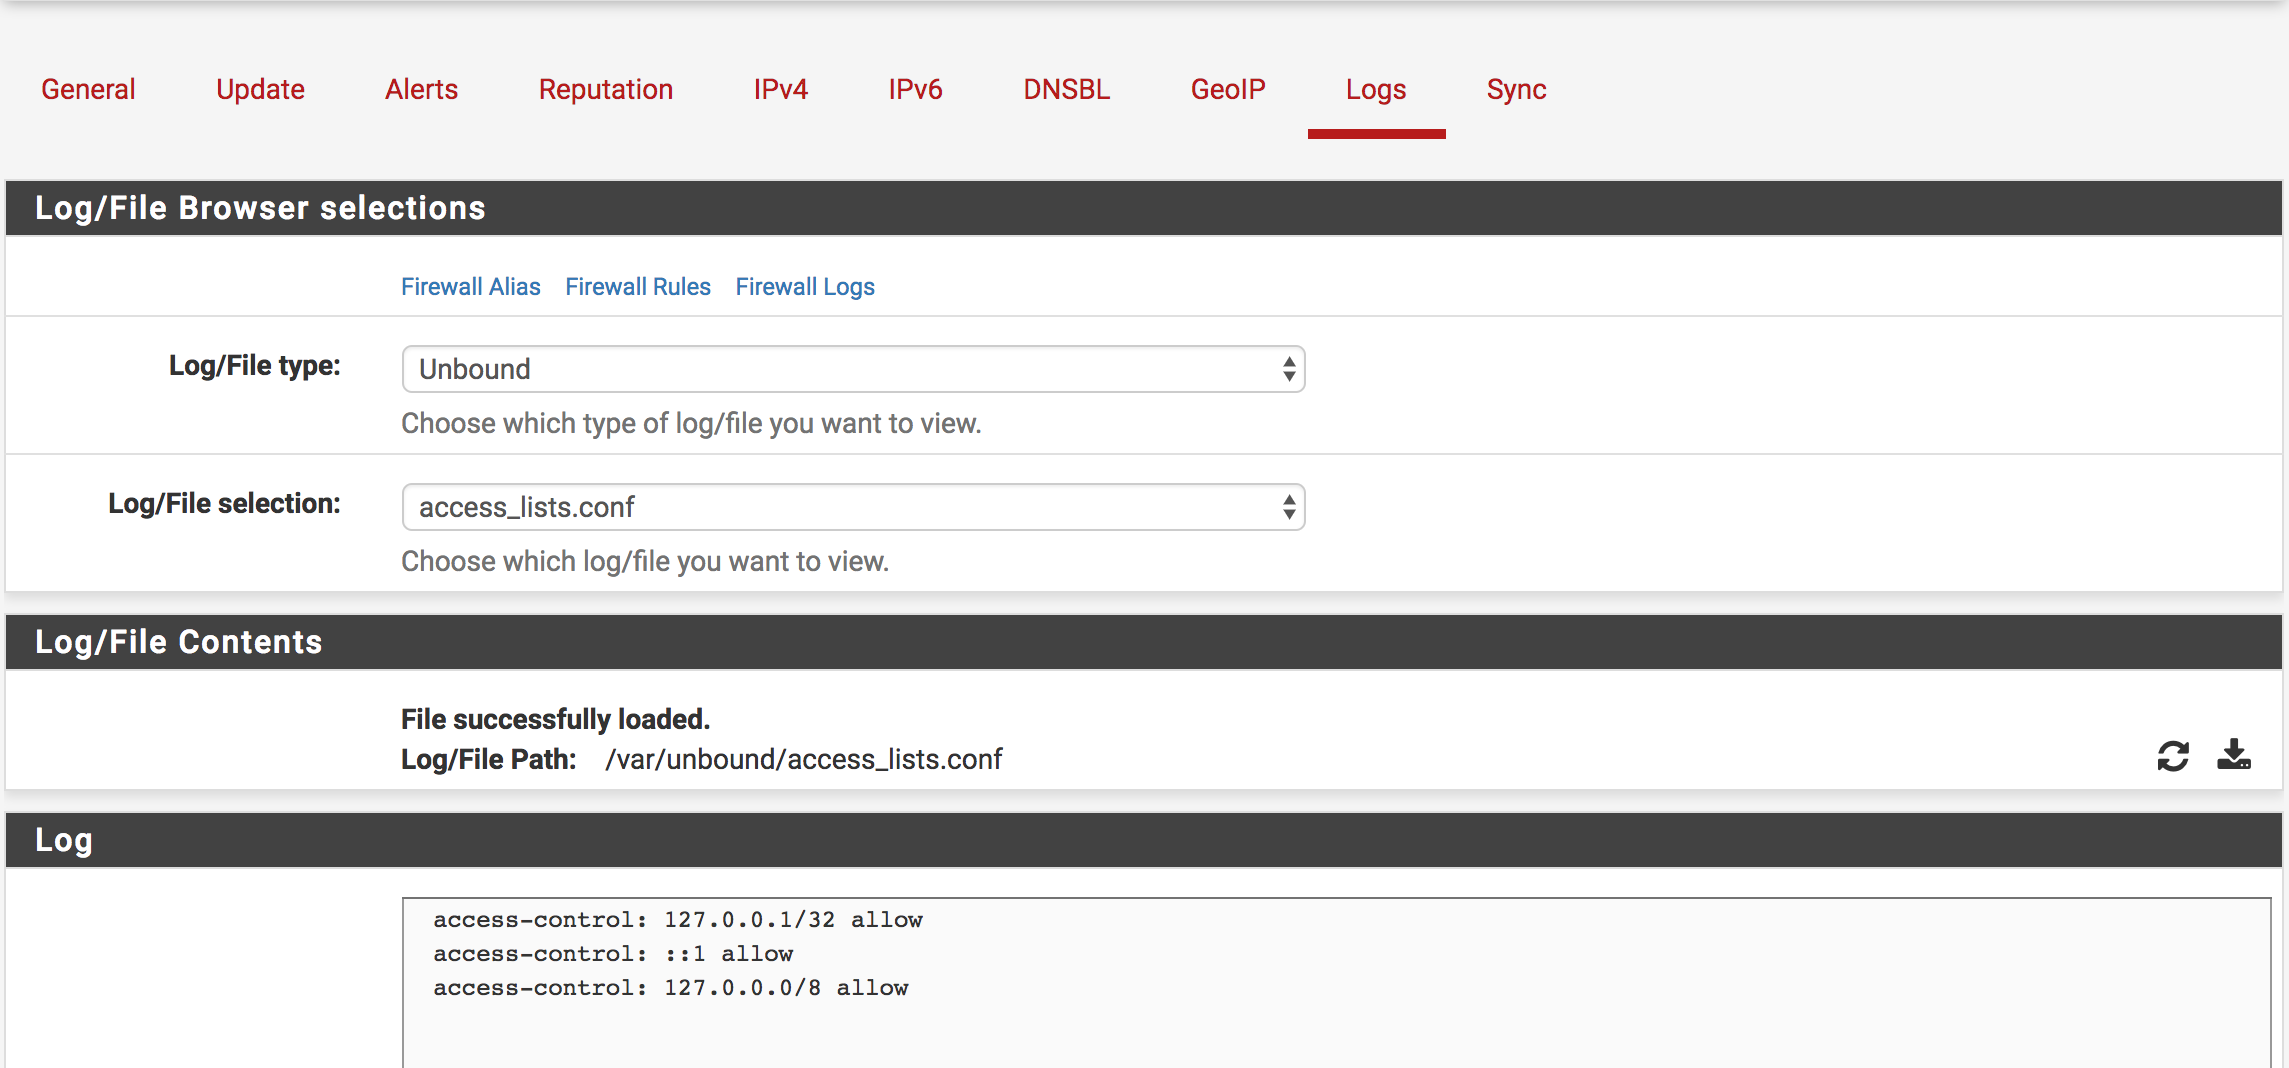
Logs
From this tab, you can see the log files of pfblockerng and analyze them easily with gui. You can access on the pfblockerng’s main tab.
The features:
- You can download the file which is you choosed.
- You can refresh the file which is you choosed.
- You can also find the path of the file on the gui.
Before/After Pictures
Two images are shared below before/after pfBlockerNG is installed. When a client/user entered a banned website, it gives an error code (1×1) by default in the top corner of the website.
This website is malicious/fake website!
Before:

After:

Note: There is no any options to change blocked page but it’s customizable by editing configuration file. Find out that on next chapter!
Customizing Error Codes
When you enter a banned website, you may want to print an error code or an image you have created. Basically, You can print the image you want (https://www.base64-image.de) as a error image by compressing it in base64 format then putting the pfblockerng’s index.php file on the appropriate place on pfsense.
Enter the /usr/local/www/pfblockerng/www/index.php with your favorite editör. Then, as you can see in the picture below, we need to put “//” front of the line which is start to line like “echo base64…” for doing comment line. Then, written the base64 code as picture below when we compress the image from the website. Do not forget the save and exit!

Finally, when a user try to enter a banned site, the user will see the picture that you have prepared. If you know how to use HTML, you can do it better.

Thanks for reading.
Leave a Reply